03 Mar

[ad_1]
Overview
In this blog post we are going to cover writing a bare-bones API in ASP.NET that can read, write, and delete data from a test database.
Setup
Since we’re going to be performing database operations, we’ll need some database software. I’ve already gone ahead and installed Microsoft SQL Server Management Studio and created a new database called [StatusCakeDemo] with a single table named [dbo].[StatusCakeDemo] as part of my previous blog post you can find here. I’ve filled it with the following dummy data:

As we’re going to be adding and deleting records from this table, the schema and contents aren’t particularly important so feel free to devise your own.
You’ll also want to create a new ASP.NET Core Web API project in Visual Studio. I’ll be building mine in .NET 5.0, if you’re following along, you should do the same also.


Once the project is set up, delete the placeholder project files as we’re going to create our own from scratch.
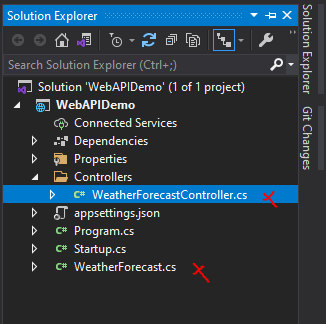


And finally, since we’ll be working directly with a SQL database we’ll need to use NuGet to install the System.Data.SqlClient Package to make things easier for ourselves.


Creating a model class
First, we’ll want to create a new class that models the type of data we will be working within the database. This object model is a representation of a single database record and needs to capture all columns we want to be able to interact with.
Create a new folder named Models in the root of the project, right-click on this folder and select Add -> Class
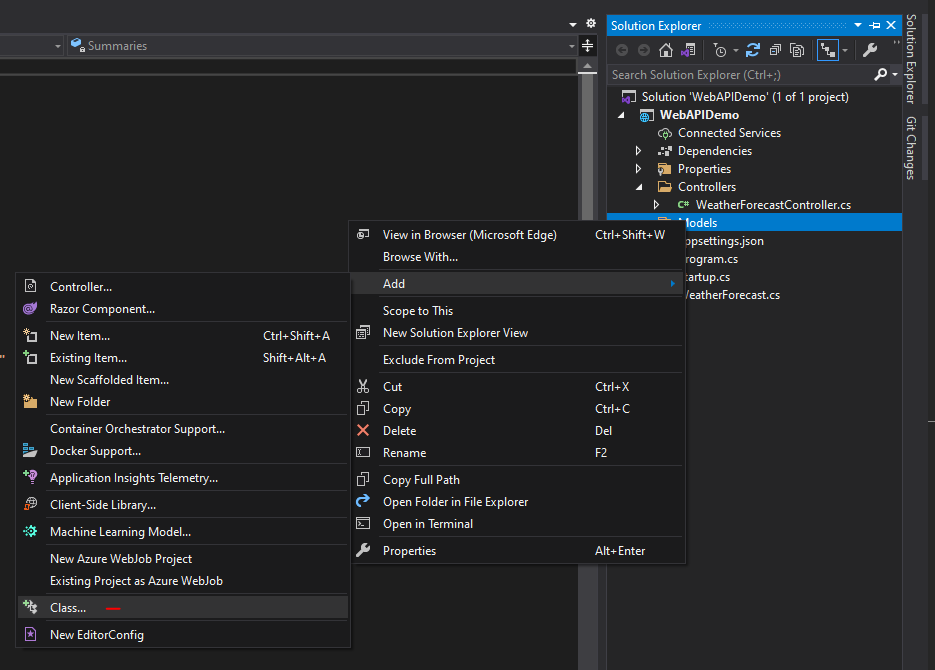


Since my database contains records that capture data related to different types of cakes, I’m going to name my new class Cake.
Let’s quickly take a look back at our database table and how our data is stored
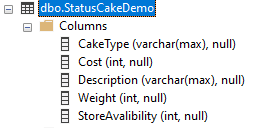


This directly informs us on how we should set up our variable types.
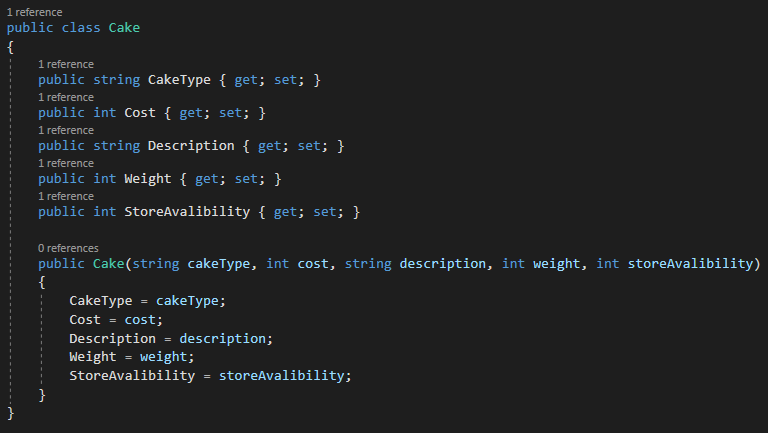


There we go, I’ve also added in a constructor method so we can initialise our Cake objects correctly. That’s it for the model, on to…
Setting up the controller class
So now we have a database that contains some data and a way for our application to model that data. The next step is creating an API Controller class that will allow us to use HTTP requests to manipulate that data.
Create a new class in the Controllers folder, I’ve called my CakeController. You’ll also want to add a using statement for Microsoft.AspNetCore.Mvc.
Next, you’ll need to add the class decorators shown in the screenshot below and also extend the class to derive from ControlerBase.
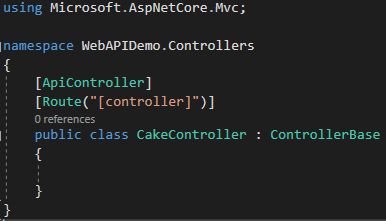


You might have seen guides where they derive from the Controller class (which derives from ControllerBase), this implementation is only useful if you are implementing views into your application.
Let’s write some methods:
Get()
Right, first things first let’s verify we can connect to our database and read the data. Create a new Get() method with the [HttpGet] attribute and create a new SqlConnection object.
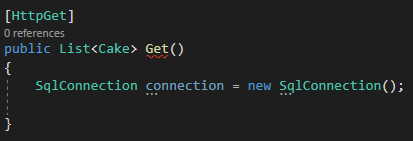


We’ll need to provide this object with our connection string into the database and instruct it to establish a connection. Like so:


Note: Since I plan to re-use the connection string for my other CRUD methods, I’ve stuck the connection string in a class scoped variable.
We then want to define our query and define a collection for our results:


And then finally set up our logic to read from the table
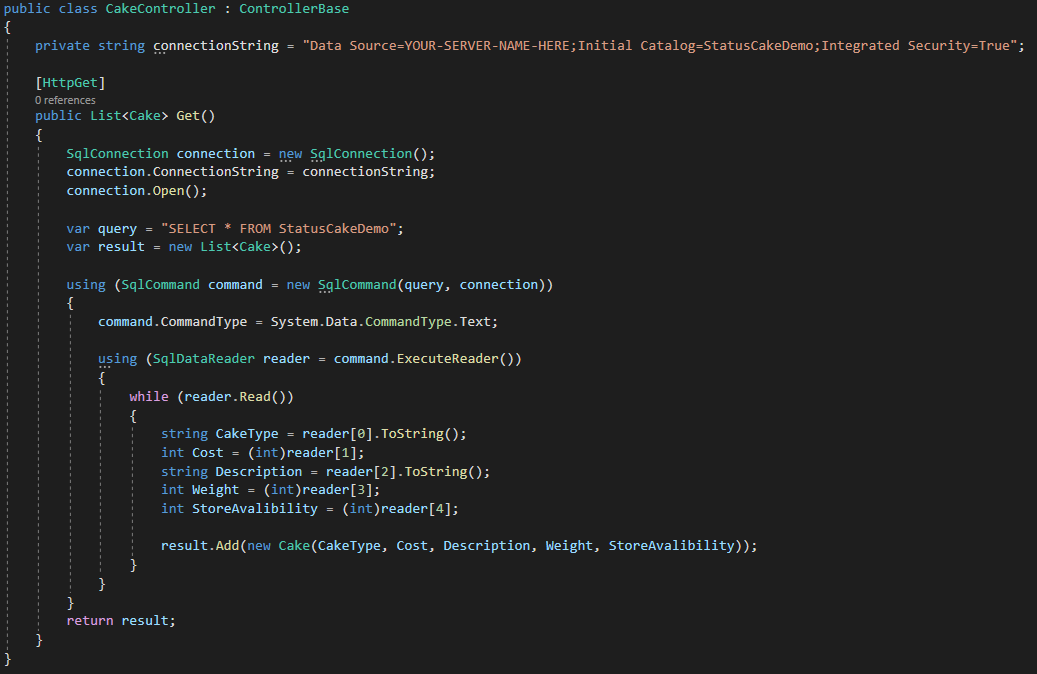


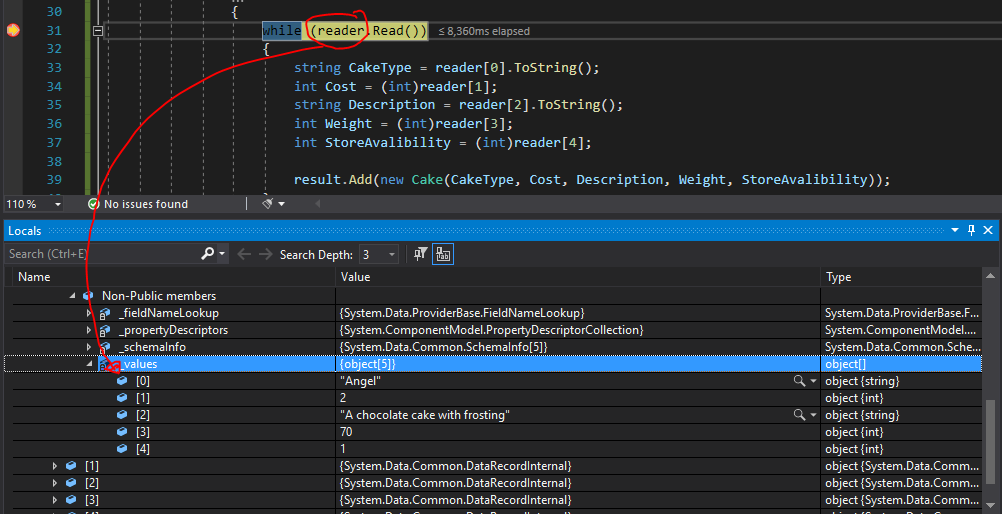
The SqlDataReader gives us our table record data in a values array which we can access with the reader[i] syntax shown above.


At this point, we’re ready to save and hit F5 to run our solution. You should be greeted by a Swagger interface window that displays our endpoints and our schema.
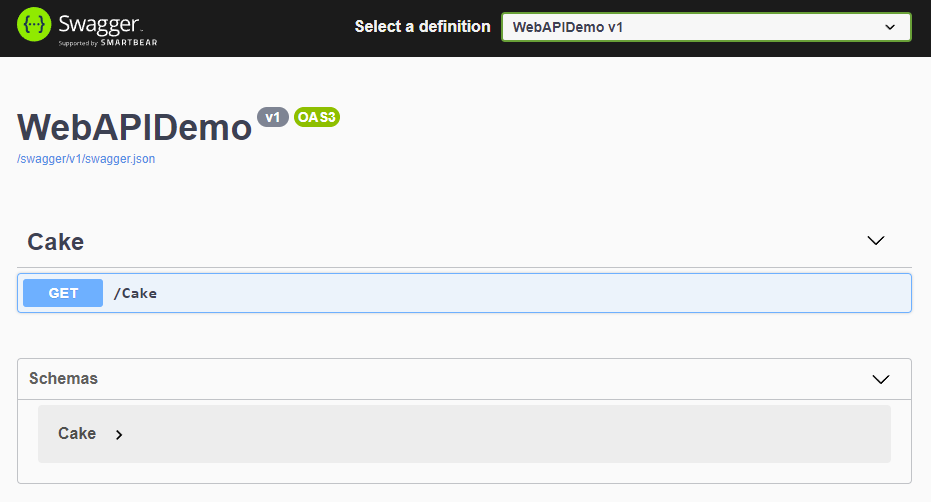


Swagger comes built into the WebAPI template project and is extremely useful for quickly testing your endpoints.
We can test that our Get() method is set up correctly by using swagger to hit the endpoint, like so:
[Insert Swagger.gif]
Awesome, there are our cakes! Now let’s look at writing a method that will allow us to add new data to our table.
Put()
Our put method is similar to our Get() method, but there are a few changes to make. Firstly change the method attribute to [HttpPut]. Then remove the return type, add the table column values as method parameters and change our query string to an INSERT command, passing in the method parameters using the parameters.Add() method.
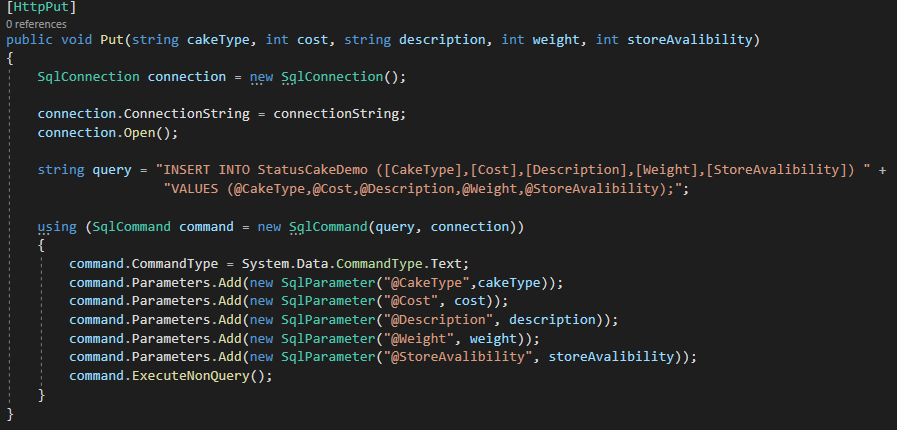


And here we can see it in action:
[Insert INSERT.gif]
Delete()
For the delete method, we need to change the method attribute to [HttpDelete]. Then decide on what match criteria you want to delete records on, I’ve just chosen to use the cakeType value as the match and updated my method parameter list to reflect that. And finally, update the query string to a DELETE query and pass in the method parameter/s using the parameters.Add() method.
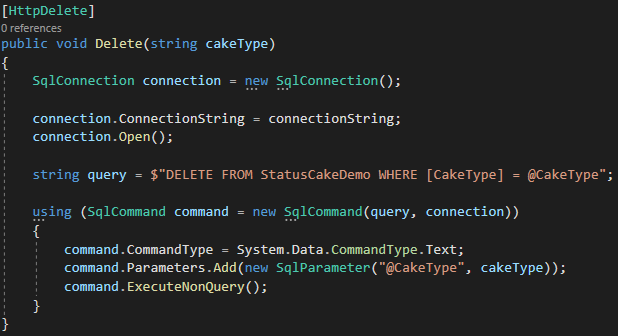


And let’s check if it deletes records correctly:
[Insert DELETE.gif]
Success!
Conclusion
And there we have it, you now have the basic skeleton of a WebAPI you can flesh out with additional features and adapted for your own projects. I’m planning to cover the .NET entity framework in the future which allows us to easily interact with complicated database schema while removing the need to write SQL code altogether.
And as always, I hope you’ve found this post useful.
You can find all the source code covered in this blog post here
[ad_2]
Source link

